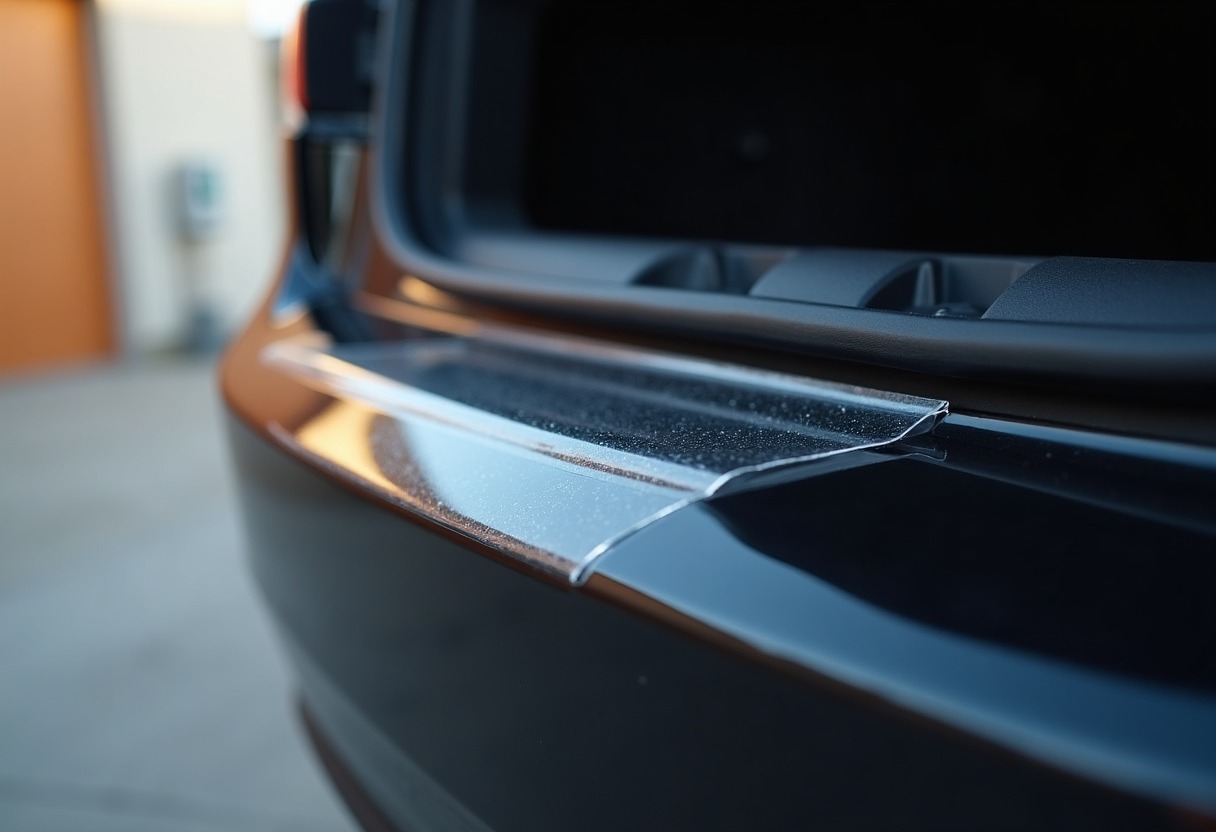
The rear bumper takes more abuse than any other painted surface on your Tesla. Every grocery run, road trip, or bike rack installation creates contact points that scratch through clear coat within weeks. Six months into Model 3 ownership, most rear bumpers show visible wear from loading — scuffs across the top edge, paint chips near the license plate, and scratches from trunk lid contact.
Why Tesla Rear Bumpers Scratch So Easily
Tesla uses a water-based paint system that meets stringent environmental standards but offers less impact resistance than traditional solvent-based automotive paints. According to Consumer Reports testing, Tesla's paint measures 3-4 mils thick compared to 5-6 mils on most luxury vehicles. The rear bumper edge sits at exactly the right height for luggage contact, shopping bags, and bike frames.
Model 3 and Model Y owners face specific vulnerability points. The trunk lip creates a loading ledge that catches every bag and box. The painted bumper surface extends below this lip with no protective cladding. The license plate area attracts scratches from mounting hardware and frame contact. Without protection, you'll see paint damage within the first month of normal use.
The cost matters. Tesla charges $800-1,200 for rear bumper repainting at service centers. Third-party body shops quote $600-900. A $40 protection film or $25 edge guard prevents this expense entirely.
Types of Rear Bumper Protection Solutions
Three distinct product categories address different damage patterns. Clear paint protection film (PPF) covers large surface areas with near-invisible 8-mil urethane that self-heals minor scratches. Vinyl edge guards protect the top trunk lip where bags slide across during loading. Rubber loading protectors create a thick barrier for heavy cargo contact.
→ Shop Tesla rear bumper protector on Amazon
Clear PPF bumper kits use pre-cut templates that cover the entire rear bumper surface or targeted high-wear areas. Quality film self-heals light scratches through heat activation — park in the sun or use a heat gun on scuffs and they disappear. Installation requires patience and soapy water application to avoid bubbles, but the film lasts 5-7 years with proper care. XPEL and 3M produce the best self-healing films, though Tesla-specific kit quality varies by manufacturer.
Vinyl trunk edge guards stick directly to the painted lip where your hand rests during loading. These 3-4 mil thick strips prevent the most common scratch pattern — horizontal lines from bags sliding across the edge. Black or carbon fiber patterns blend with most Tesla colors better than clear options. The adhesive holds strong through car washes but leaves no residue when removed. Replace them annually or when edges start lifting.
Rubber loading guards mount to the bumper with 3M adhesive or mechanical clips. The thick rubber (6-10mm) absorbs impact from heavy items like toolboxes, camping gear, or construction materials. These guards show more obviously than film but provide superior protection for owners who regularly haul equipment. Most extend coverage to the license plate area where mounting hardware causes scratches.
Similar to our testing in Protecting Tesla Paint PPF Vs Ceramic Vs Vinyl, film thickness and self-healing properties determine long-term performance. Thicker isn't always better — installation difficulty increases with thickness, and ultra-thick films show edge lines more visibly.
Protection Method Comparison
| Protection Type | Coverage Area | Installation Time | Visibility | Lifespan | Best For | |----------------|---------------|-------------------|------------|----------|----------| | Full PPF kit | Entire bumper | 45-90 minutes | Nearly invisible (edges visible in direct light) | 5-7 years | Complete protection, resale value preservation | | Partial PPF | Top edge + impact zones | 20-30 minutes | Minimal (edge lines at boundaries) | 4-6 years | Targeted protection, lower cost | | Vinyl edge guard | Trunk lip only | 10-15 minutes | Slight texture difference | 1-2 years | Loading area only, easy replacement | | Rubber loading guard | Bumper face + lip | 15-25 minutes | Clearly visible (black strip) | 3-5 years | Heavy cargo, frequent loading |
The best approach combines methods. A vinyl edge guard handles daily loading wear while PPF protects the painted bumper face from shopping cart impacts and road debris. This layered strategy costs $60-80 total but covers all damage vectors.
Recommended Protection Products by Use Case
For daily grocery and cargo hauling: A trunk edge protector handles 80% of bumper damage for Model 3 and Model Y owners. → Shop trunk edge paint guard on Amazon for adhesive-backed vinyl strips that install in ten minutes. Look for 4-6 inch wide coverage that extends beyond the immediate contact point. The wider guards prevent bag corners from catching bare paint when items shift during loading.
For maximum paint preservation: Full-coverage PPF kits protect the entire rear bumper surface including the license plate area and lower valance. → Shop clear bumper protection film on Amazon for pre-cut templates specific to your Tesla model and year. XPEL Ultimate Plus and 3M Pro Series offer genuine self-healing properties that cheaper films fake with marketing claims. Budget 90 minutes for careful installation and use the included spray solution generously to position the film correctly.
For bikes, gear, and outdoor equipment: Rubber loading guards create a sacrificial barrier that accepts scratches without transferring damage to paint. → Shop rear bumper loading guard on Amazon for thick rubber strips with strong adhesive backing. These guards mount flush to the bumper curve on Model 3 and Model Y without gaps. The raised profile keeps bike racks, cargo carriers, and heavy boxes from direct paint contact. Owners who regularly use their Tesla for camping (see Best Tesla Camping Gear 2026) benefit most from this heavy-duty protection.
For minimal visibility with good protection: Partial PPF kits cover just the top 4-6 inches of bumper and trunk edge where contact happens most. → Shop Tesla Model 3 bumper film on Amazon for targeted coverage that costs less and installs faster than full kits. These partial kits work well when combined with a rubber loading guard on the lower bumper — you get comprehensive protection without covering every painted surface.
For lease returns and resale prep: Full PPF installation six months before lease end prevents wear charges from Tesla Finance. The film removes cleanly without paint damage, restoring the bumper to like-new condition. Combined with Tesla Door Sill Protection Guide solutions, you avoid the $500-800 in cosmetic charges that appear on most lease returns.
Installation Tips and Common Mistakes
Most bubbles and edge lifting stem from rushing the process. PPF installation requires ambient temperature above 60°F — cold film doesn't stretch or conform properly. Clean the bumper with isopropyl alcohol after washing, not just soap and water. Any wax, ceramic coating, or residue prevents adhesive bonding.
The spray solution ratio matters. Mix 3-4 drops of baby shampoo or dish soap per 16 oz water — too much soap prevents the adhesive from grabbing, too little makes the film stick immediately before you position it. Spray the bumper surface generously and mist the adhesive side of the film before applying.
Start film installation at the center and work outward using a squeegee to push water and air toward the edges. Don't pull the film tight during application — let it settle naturally into curves and body lines. Pulling creates tension that releases later as edge lift. Use a heat gun on low setting (120-140°F) to help the film conform around complex curves near the license plate area and bumper corners.
Edge sealing determines longevity. After squeegeeing out all water, run your squeegee firmly along every edge while applying light heat. This "tacks down" the perimeter where lifting typically starts. Avoid washing the car for 48 hours after installation to let the adhesive fully cure.
Vinyl edge guards need less fuss but still require clean, dry surfaces. Wipe the trunk lip with alcohol and let it flash off completely before sticking the guard. Position it once and press firmly — the aggressive adhesive bonds on contact and repositioning creates weak spots. Most guards include multiple pieces for full lip coverage; overlap the pieces by 1/8 inch rather than butting them together to prevent gaps.
Skip the "protective coating" sprays marketed with these products. They add cost without benefit — quality PPF doesn't need additional sealant, and vinyl guards perform better without slippery coatings that reduce adhesion.
FAQ
How long does Tesla rear bumper protection film actually last? Quality PPF lasts 5-7 years on rear bumpers with proper care, while vinyl edge guards need replacement every 12-18 months due to direct loading contact. UV exposure, car wash frequency, and mechanical abrasion from loading determine actual lifespan — bumpers that see weekly cargo hauling wear through protection faster than those used mainly for passengers.
Can I install paint protection film myself or should I pay for professional installation? DIY installation works fine for partial kits and edge guards if you follow the wet-application method carefully and take your time positioning the film. Full bumper PPF kits challenge first-timers due to complex curves and the large single-piece application — budget 90 minutes and accept that edges might show slight imperfections compared to professional results that cost $300-500 for rear bumper coverage.
Does rear bumper protection film affect Tesla's paint warranty? Quality automotive-grade PPF and vinyl guards don't void Tesla's paint warranty since they use pressure-sensitive adhesives that remove cleanly without damaging factory clear coat. Cheap films with aggressive adhesives or improper removal technique can pull paint, so stick with established brands like 3M, XPEL, or SunTek that Tesla service centers recognize as safe.
Which protection works best for preventing scratches from bike racks? Rubber loading guards provide the best protection against bike rack contact since they create a thick sacrificial barrier that absorbs frame impacts without transferring force to paint. Combine a 6-8mm rubber guard on the bumper face with vinyl edge protection on the trunk lip — bike frames hit the rubber while straps and arms contact the lip during loading and securing.
How do I remove old bumper protection film without damaging paint? Heat the film to 140-160°F using a heat gun or steamer to soften the adhesive, then peel slowly at a 45-degree angle starting from one corner. Any remaining adhesive residue comes off with Goo Gone or isopropyl alcohol applied with a microfiber cloth — never use scrapers or abrasive pads on Tesla's thin paint. The removal process takes 20-30 minutes for full bumper coverage.
Protecting your Tesla's rear bumper costs less than one professional detail session but prevents hundreds in repainting expenses — the investment makes sense whether you plan to keep the car for years or return it at lease end.
Some links on this page are affiliate links. We may earn a small commission if you purchase through them, at no extra cost to you.
As an Amazon Associate we earn from qualifying purchases. This article contains affiliate links; if you buy through them we may earn a small commission at no additional cost to you.